/ Posts
August 10, 2017
JS native face detection
When I first read Paul Kinlan's blog post about native face detection, the movie Ghost in the Shell was about to be released. I'm a big GitS fan, and was willing to simulate the Laughing Man L337 H4x0r powers as an excuse to play with the API.
I ran to Chrome Canary on macOS to test it and…it didn’t work. It was only
working for Android at the time. But now with FaceDetector working reliably in
Chrome for macOS, I can finally pretend to have some Laughing Man skills.
Face detection was already possible on the web through 3rd party libraries like Tracking.js. But sharing the same thread for user interaction and object detection plus the lack of hardware acceleration makes the experience a bit janky.
The FaceDetector is part of the
Shape Detection API,
currently on the Web Incubator CG.
It’s hardware accelerated, uses specialized OS calls when available and doesn't
run on the main thread.
Enabling the API
Since this is still an experimental API, make sure to have the latest Chrome
browser and enable it using the URL
chrome://flags/#enable-experimental-web-platform-features.
Live examples
Below an example of face detection on a <video> tag.
If you want to see it in action before we go deeper with the code, try the below links:
API
The API is fairly simple. First step is to create a FaceDetector instance. It
exposes only one method called detect that accepts a CanvasImageSource,
Blob, ImageData or <img> element as argument.
The method will not use the main thread and reports the end of computation via a
promise.
const faceDetector = new window.FaceDetector()
const $img = document.querySelector('img')

try {
  const faces = await faceDetector.detect($img)
  console.log('Faces detected: ', faces)
} catch (error) {
  console.error('Error on face detection: ', error)
}
Detecting faces on a video frame
For video we need a couple more steps. Because FaceDetector doesn't work with
<video> tags, we need to use <canvas> to draw a frame.
First step is to create a <canvas> element with same dimensions as the
<video>. Then we make the <canvas> invisible, since it will be used only as
a bridge between <video> and FaceDetector.
function createCanvas ($video) {
  const $canvas = document.createElement('canvas')
  const videoCompStyle = window.getComputedStyle($video)
  $canvas.width = videoCompStyle.width.replace('px', '')
  $canvas.height = videoCompStyle.height.replace('px', '')
  $canvas.style.display = 'none'
  document.querySelector('body').appendChild(canvas)

  return $canvas
}

const $video = document.querySelector('video')
const $canvas = createCanvas($video)
With the <canvas> element created, we can draw a video frame on it and call
FaceDetector on the drawed imaged.
const context = $canvas.getContext('2d')
const videoCompStyle = window.getComputedStyle($video)
const videoWidth = videoCompStyle.width.replace('px', '')
const videoHeight = videoCompStyle.height.replace('px', '')

context.drawImage($video, 0, 0, videoWidth, videoHeight)

const faces = await faceDetector.detect($canvas)
if (faces.length) {
  const face = faces[0].boundingBox
  console.log('Face detected on video frame: ', face)
} else {
  console.log('No face detected on video frame.')
}
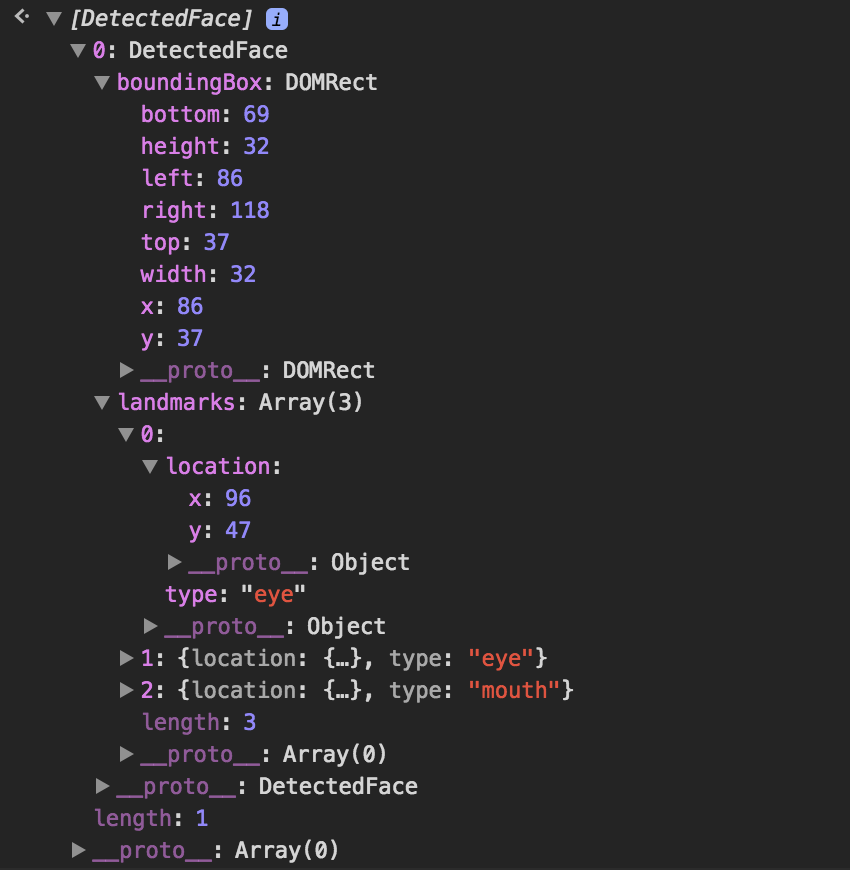
The detect method returns an array of DetectedFaces objects. DetectFace is
an object with boundingBox and landmarks keys. boundingBox describes a
square related to the detected faced. landmark is an array of places of
interest on the detected face like eye, mouth, …
With that information, we can now put an image on top of the detected face.
const $overlay = document.createElement('img')
$overlay.src = 'https://path-to-your-image-overlay'
$overlay.style.display = 'block'
$overlay.style.position = 'absolute'
$overlay.style.left = `${face.left - (face.width * 0.5)}px`
$overlay.style.top = `${face.top - (face.height * 0.75)}px`
$overlay.style.width = `${face.width * 2}px`
$overlay.style.height = `${face.height * 2}px`
Detecting faces on every video frame
With the above code, we are able to detect faces in a video frame. In order to get face detection on every frame, we have to run the same code above in a loop, since a video is just a sucession of frames.
async function loop ($canvas, $video) {
  window.requestAnimationFrame(() => loop(canvas, video))
  const context = canvas.getContext('2d')
  const videoCompStyle = window.getComputedStyle(video)
  const videoWidth = videoCompStyle.width.replace('px', '')
  const videoHeight = videoCompStyle.height.replace('px', '')
  context.drawImage(video, 0, 0, videoWidth, videoHeight)

  clearTimeout(hideTimeout)
  if (faces.length) {
    const face = faces[0].boundingBox
    console.log('Face detected on video frame: ', face)
  } else {
    console.log('No face detected on video frame.')
  }

  if (isDetectingFaces) return

  isDetectingFaces = true
  faces = await faceDetector.detect(canvas)
  isDetectingFaces = false
}
Using requestAnimationFrame on the first line we, well, request that the
loop function run again on the next frame. And so on. Endlessly.
faceDetector.detect takes time to finish the face detection on a given frame,
and we don’t want to start another call before the previous one finished. For
that we use the flag isDetectingFaces to prevent a new call.
And now we can reuse the same code above to move the overlay on top of the detected face.
Source code
For a complete working solution, check the GitHub repo. All source code is available there. Any doubts or feedback, please create an issue.
An npm package called
laughing-man is also available. It’s just a wrapper to put an overlay image on
top of a detected face using the FaceDetector API.